WELCOME TO THE kitchen ARCHIVE!
Showing posts with label kitchen. Show all posts

25 May 2016

Interpreting Historic House Blueprints

The conception of most buildings, residential houses included, has historically involved some sort of architectural drawing. Whether crudely crafted as a rough hand sketch or professionally drafted and reproduced, drawings serve to visualize, communicate, and translate a building's design. I've written before about the importance of at least making an inquiry at your local building department regarding the possible existence of your home's original permit drawings. The older your house is, the more likely you are to come up empty in this search. However, the value which bona fide architectural drawings can bring to the richness and understanding of your house's history make it worth the effort to try a few other places as well, such as historical societies, county archives, and architectural archives. One such repository here locally is the Athenaeum of Philadelphia, which houses an extensive collection of drawing archives and maintains an outstanding online database of Philadelphia Architects and Buildings. While age may decrease your odds of finding plans, if your home has local significance then the odds may increase that some drawings have been preserved throughout its history at such a repository. One other way to potentially locate old drawings for your house is through previous owners or their descendants. Perhaps the son of an original owner felt deeply connected to the house in which he grew up and was able to hang onto the plans.

So let's say you score. You are able to locate historic drawings for your home-- now what? Let us look at a case study. Last month, I published a Saturday Spotlight article featuring a 19th century folk/vernacular home in Roxborough, which had been significantly modified with renovations and a major addition by noted Philadelphia architect Robert Rodes McGoodwin in the mid-1930's. Fortunately, a blueprint copy of drawings for the project has survived and been passed down through the progression of ownership history of the house. The current owner has been kind enough to grant permission for me to share and interpret the blueprints here, so let's do exactly that. A scan of the entire sheet is shown below and includes primarily floor plans and elevations.

Scan of blueprint copy. Courtesy of the home's owner.

Provenance

As described, we know that this an authentic copy of the original architectural drawings. That is of no doubt, due to its having remained with the house. In drawing set standards, the title block is essentially what it sounds like-- a block of space on the sheet reserved for basic information including project name/location, the name of the architect or firm, client's name, drawing scale, the drafter's initials, and the title and date of drawing issues and revisions.

The drawing sheet title block, providing basic information for the project. At right is a photo of architect Robert Rodes McGoodwin. (Photo source: University of Pennsylvania Archives)
Looking in the lower-right corner of the drawing sheet here we see the title block. Some of that basic information includes:

Title: "Alterations & Additions to Frame House at S.E. Corner of Spring Lane and Paisley Road, Roxborough, Phila., Penna."
Owner: Mrs. Samuel F. Houston
Architect: Robert Rodes McGoodwin, Registered Architect

These pieces specifically tie the drawings to its exact current location. McGoodwin is known to have been commissioned by Samuel Houston for a number of residential properties in Roxborough. As described in the previous article on this home, the Houstons never lived in this home but did own it and alot of land in the neighborhood, commissioning the expanded design of this home as part of a larger effort to bring up the standards of Roxborough at-large. The specification of Houston's wife as the Owner might be an indicator that she may have been more heavily involved in dealing with McGoodwin and his associates for this particular house than her husband was. The original date of the drawing was October 19, 1935 and a revision is noted and dated November 12 of the same year. That November 12 date is likely when the original hand-drafted version of this copy was produced. While there is the possibility that this or some version of this drawing was used for construction, there likely were additional drawings for the builder. I believe that this copy is a final or near-final progress copy used by the architects to communicate the design to the owner, thus its having been passed down through ownership history.

Floor Plans

Most people understand what floor plans are. An architectural floor plan depicts the layout of a building, viewed from overhead, as if one were to take a horizontal slice through it about 4-feet above the floor (in order to show doors, windows, etc). Taking a look here at the first floor plan, I've highlighted a number of standard architectural drawing conventions in yellow. Of course, each room is labeled with its intended use "Kitchen", "Pantry", "Living Room", etc. Primary dimensions of various rooms and of the overall addition are provided. Window tags assign a number to each window, which would typically correspond to a window schedule (not seen in this blueprint), which is a list of all the planned windows with their sizes and other pertinent information. Standard symbols show locations of electrical outlets as well as lighting locations.


A few things to note about the layout itself. McGoodwin's task in 1935 was to design an addition onto an existing house. On the blueprint, I can see the original house comprising the rooms labeled "Living Room", "Alcove", "Dining Room", and "Hall" as this resembles a common arrangement of rooms in many earlier vernacular homes. There are other clues here as well which tells us where the old ends and the new starts. At both the top and bottom of the plan, there is a line cutting through the center of the house labeled "Face of Old Studs". The studs are the vertical wood framing members of the original house. To the right of that line, all the walls are "unhatched", meaning they aren't colored in by the draftsman. This drawing convention in this case indicates all of the existing wood-framed walls. To the left of that line, the walls are "hatched" or "poched" (colored-in solid), indicating new walls built of cinder blocks.

This 1935 addition essentially turned a fairly basic house into an upper class or upper-middle-class residence. The addition is setup as the "servant zone"-- it is more or less an "ell" addition, meaning it is not as wide as the original house and relocates the kitchen function there. The original kitchen may have been where the dining room is now, adjacent to the fireplace. A new garage is added onto the ell addition, and a secondary set of stairs has been added at the kitchen for use by servants to travel to the Laundry Room directly below in the basement and to the servant's bedroom above the garage.

There are a few significant differences between the 1935 layout and the current 2016 floor plan of the house. A powder room is now provided at the 1935 coat closet off of the front Hall; the access to the basement remains with an additional door within the powder room. Today of course there are no servants, no service "wing" of the house, and the house merely functions as a residence for only the family itself. Thus, at some point in the past, there was less need for a separate storage pantry at the kitchen; the wall separating the pantry from the kitchen was removed, giving way to the modern trend of a larger centralized kitchen.

The current kitchen. At the far wall are two doors to the staircases which once were used by servants, as well as built-ins original to the 1930's addition. This photo is taken standing at a spot which was formerly part of the pantry. The wall between the kitchen and pantry would have been where the oven range currently sits, cutting to the left across the view in the photo. Photo courtesy of The Sivel Group.
The space marked "Alcove" on the First Floor Plan is now a home office, with access off of the main hall and now closed off from the Living Room. That Living Room was expanded over time by enclosing the porch and filling in the remainder of the depth of the original house with a one-story cinder block addition. This is the area covered in yellow by me on the first floor plan above. The result is the generously-spaced living room existing today.

The current living room. The walls painted in green, and the fireplace, in this photo are all within additions which occurred after the primary c. 1935 renovation. The original exterior wall of the house would have existed approximately at the left edge of the larger built-in shelving, coming out perpendicular and crossing to the back face of the house. Photo courtesy of The Sivel Group.
The most significant difference at the second floor between the 1935 floor plan and that of today is seen in between the two bedrooms marked "Chamber #1" and "Chamber #2" on the Second Floor Plan blueprint below. The alcove to the right of the bathroom has been eliminated by removing the wall between it and the bathroom, effectively creating a large master bathroom off of the master bedroom (Chamber #1). There is still access into this bathroom from the second bedroom.

Scan of Second Floor Plan blueprint, courtesy of the home owner. Although the image is stretched a bit, the Bath and Alcove have recently been combined into a larger master bathroom, seen in the following image.
Current master bathroom. The wall between the original bathroom and the "alcove" / dressing area used to come across where the vanity exists currently. Door to "Chamber #2" seen in the background. Photo courtesy of The Sivel Group.
Two more bedrooms on the Third Floor. They're still there, I saw them. Scan of blueprint courtesy of the homeowner.

Elevations

The term "elevation" in architectural drawing parlance refers to a straight-on view of the exterior facade. On this drawing sheet, we have elevations for all four primary facades of the expanded 1935 house. In this analysis, we will focus on the street-facing (front) facade as well as the backyard (rear) facade.


In the Northwest Elevation above, I have added a few marks in yellow to call out what the architect is conveying with certain drawing conventions. Again, we delineate the extents of the original house as well as those of the 1935 addition. As part of the building's facelift, most of the window openings remained as-is, but some were filled in and others were created new to produce the rhythm McGoodwin sought on the home's exterior. At those new window openings, we see annotation calling out the size of window headers required to span the opening structurally (8"x10", 8"x12"). Also on the elevations we see the basement and foundation construction drawn in lighter, dashed lines, indicating that this construction is below ground level. At the left side of the elevation drawing, each floor level is noted and the floor-to-floor height (vertical dimension between floor levels) is provided. Throughout, building materials are called out with additional annotation: "T&G boards" refers to tongue and groove wood trim; "clapboards" are the horizontal wood siding;"wood lattice" is called out at the side porch area; and on the rear facade of the house, McGoodwin's firm included a "wood and W.I. trellis", W.I. standing for wrought iron. This trellis, as well as the side porch, no longer exist today, so this is a fantastic and accurate depiction of what these features once looked like on the house.

Blueprint copy of the rear elevation, courtesy of the homeowner. A trellis!

Capturing a Home's Evolution

This particular house has lived several lives, taking on a new personality on multiple occasions. Originally, in the 19th century, it existed as a relatively simple home with a Folk Victorian style. Then, in the 1930's, a well-known architect crafted an extensive renovation and addition. Without the blueprints which have survived for 80 years, while we might be able to determine this house's evolution, it would have taken much more detective work. Had this home been significantly altered even further after the 1930's addition, these blueprints would have been invaluable in coming close to understanding the house's history at the particular point in its history. These professionally hand-drafted drawings provide insight into the mind of the architect so many years ago, and hopefully now you might be able to interpret more of what you'd find on a set of blueprints if you happen to locate some for your historic house.

At left: the rear of the house as it exists today, trellis long gone. Photo courtesy of The Sivel Group. At right: the rear of the house prior to McGoodwin's intervention, pre-trellis. Historical photo courtesy of the home owner.
Read More »

21 April 2016

Physical Evidence: Ceramic Tiles Pop Up in the Bathroom, Revealing Old Vinyl Flooring

Slowly, over the last month, the grouted joints between the ceramic tiles in our main bathroom have begun to crack. This has occurred to a minor degree ever since we moved into the house nearly two years ago, but only recently began to become a real issue. The joint cracking was also more significant at the area right against the tub. I had already previously noticed that the perimeter of the ceramic tile floor (against the walls and against the tub) were hard grouted joints, rather than flexible sealant joints, leaving the flooring nowhere to expand and contract without cracking. I had been hoping that the problem was merely because of that sole issue.


Well, it wasn't. Finally, this week, two of the tiles against the tub came fully unbonded from the subfloor beneath. Once I was able to fully lift up these two tiles, the improper installation of this ceramic became evident:

Not good.
What you see here is old flooring, and at a small portion of this area you see wood subflooring, which is now wet on the top side (the underside has been and continues to appear sound from the basement). What you do NOT see is any type of backerboard or underlayment matting. In case you were wondering, that is NOT the way to install new ceramic tile over existing vinyl floor. Sigh. This relatively new ceramic tile is now useless-- it all needs to come out. I have already begun making calls to tile contractors to have them come out for estimates.

Well, Let's at Least Learn More History About This House

We might as well take a closer look then and understand the two layers of previous flooring I see here. I had to do this carefully, however. The reason that I'm not even considering replacing this tile myself, and providing another layer of concern, is that the dark-colored flooring you see has a very good chance of containing asbestos. Aside from removing the ceramic tiles for inspection, I have tried to not mess around with this and to keep it more or less as-is, due to the potential hazard.

First off, what do I know about the history of this bathroom? I know that this is the only bathroom of the two that is original to the 1920's house. The only other bathroom was converted from a kitchen in the 1960's. This original bathroom was part of the second living unit, used by family members of the Cantlins after the house was modified into a duplex. There used to be an exterior window at the tub area. After it was re-instated back to a single-family house by my house's previous owners after 2001, the window was infilled, the bathroom was remodelled, and a fiberglass shower surround was installed. The exact timeframe of the remodel is unknown. Judging by the floor tile installation, I'd guess that this was performed in preparation of placing the home on the market.

Anyway, the dark-colored tiles measure 9" x 9"-- a common dimension for vinyl-asbestos tiles produced prior to the 1970's. I'd guess that what I see here was originally installed in the 1950's or so, perhaps as the Cantlins began to convert the house to a duplex. It may even be older since there does not appear to be much of a pattern to it-- perhaps even the 1940's, when the Cantlins were building an addition onto the back of the house.

As for the lighter, beige-colored flooring, this appears to be from the 1970's or early 1980's. It has a decorative pattern and appears to have largely been removed with the exception of a few remnants at the tub.


Based on the small section and the partial fragments I am seeing, it could either have been a sheet or 12" x 12" tile. This could be more of a linoleum sheet product, but even in the 1970's-80's one cannot rule out vinyl-asbestos without having it lab-tested.

Next Steps

Asbestos-containing materials (ACM's) do not need to be a cause of panic by any means, if they are in good physical shape and are of the less friable varieties. In the case of vinyl-asbestos floor tiles, the percentage of asbestos in the tile's composition could be as little as below 5%. That said, these materials ABSOLUTELY must be treated with care, and consultation by professionals licensed to inspect for asbestos is always a good idea. In my case, you can see that at least one of the 9"x9" has broken once, meaning that at least a small, yet hopefully still safe, level of asbestos fibers may have been released.

My plan of attack is first to have a few professional TILE installers in to provide a consultation and recommendations. I want a company specializing in tile installation, not just a handyman that has the ability to throw down a few tiles. If the tile contractor I decide to hire is able to leave the old flooring in place to encapsulate it under a proper and professional installation, then all the better. If a proper substrate can not be provided over the old vinyl and it must come out, then I probably at least need to have the tiles tested and may need to have a licensed asbestos professional in sooner rather than later. Even if the tile setter is able to keep the old tile in place, at the very least I plan to have the air tested.

Even though this is an unwelcome monetary expense to deal with, it is always interesting to me to uncover old building materials. After all, I still consider these layers to be part of the history of the home.
Read More »

13 January 2016

Re-Examining the Previous Layouts of the House

As far as I have been able to discern thus far, the floor plan layout of my house has gone through at least four significantly different iterations. I took my first shot at one of these previous layouts several months ago, after discovering evidence of a now-abandoned kitchen at the back of the house. In hindsight, those conjectures were incorrect after further investigation. Now, given the benefit of a lengthy conversation recently with long-time owner Catherine Cantlin's daughter-in-law, I take pause to examine what I know in terms of the layout history. The evidence gathered has been documentary, anecdotal, and physical. The first floor has always been the only real occupied space, with the unfinished basement below and the attic above. What follows is my present understanding of how the layout has changed throughout ithe house's roughly 93-year history.

Original Layout (c. 1923 to 1940s)

During its first 15-20 years, this house was one of the only ones in existence on the block, and it was a very modest home at roughly 750 square feet. Although I do not believe it was a mail-order kit house, the design may have been found in a pattern book I have yet to locate. This kit model sold by Montgomery Ward in 1930 is very close to what I believe to be the original layout of the house. Here is my own sketch:


Throughout its existence, the left half of the plan has generally contained living spaces, while the right half has contained bedrooms. Originally, one entered from the front porch into a modest-sized living room. This room has always held a view through a large cased opening into what is now the kitchen but was originally the dining room. Beyond the dining room was an enclosed kitchen at the rear of the house, off of which was an exit to the backyard. These functions in these locations were confirmed by the Cantlin daughter-in-law. Just to the left of the back steps was an exit staircase from the basement (a set of steps which still exists today but is entombed beneath my living room). I consider it a pretty safe assumption that the stacked staircases to the basement and attic remain today in their original locations. On the right side of the house, the main bedroom was off of the living room, with a second bedroom at the back, and the house's only bathroom was sandwiched in between the two.

New Rear Addition; Duplex Phase 1 (1940s to early 1960s)

Perhaps ironically, I am a bit less sure about this iteration of the layout than I am of the original layout. The lack of clarity rests primarily in whether or not the rear addition was completed in one or two phases, and when. What I do know, positively, is that a rear porch, which constitutes the upper-left corner of the floor plan, was enclosed in 1946 to create more interior space (due to receipt of a copy of that 1946 building permit). The construction and design of the addition lead me to believe that the entire addition inclusive of the un-enclosed porch was built at one time, prior to 1946, with that porch enclosure occurring later. To date I have not been able to locate backup documentation. Here is what the plan may have looked like both before and after the porch was enclosed:


I believe that the gabled, primary portion of the addition may have included a third bedroom to the left and a second kitchen to the right. Off of the new bedroom would have been the porch-- and once enclosed, it expanded the size of the bedroom. During this time period, John and Catherine Cantlin's children were reaching adulthood and the parents portioned off half of their newly expanded house, creating a duplex for their family members. The second unit was not fully closed off from the main unit at this point, as it was family living there. According to their daughter-in-law, all three of the adult children lived in the apartment at some point. The left-side (main) unit contained the connected living/dining room, the original kitchen, and the near rear bedroom. The right-side apartment contained entry from the rear into a new door at the new kitchen. Then, progressing towards the front past the attic steps was the apartment living room, which could also double as a bedroom if required. The original bathroom may have been shared across both units during this time period-- the door opening accessing the hallway from the dining room may or may not have existed. Lastly, the original primary bedroom was now the main bedroom for the apartment.

Kitchen Relocated; Duplex Phase 2 (1960s to 2001)

Also according to the Cantlins' daughter-in-law, Catherine made some further changes after husband John's death in 1961. Most significantly, the house's original kitchen was converted into a new second bathroom. Permit records confirm this change and provide a date of November 1963. If there was indeed access to the original bathroom from the dining room at this time, it was closed off at this time. Kitchen cabinetry and plumbing was installed along the left-side wall of the dining room, turning it into an eat-in-kitchen.


The remainder of the duplex is as described in the previous iteration. The sketch above shows the Cantlins' newer rear bedroom expanded into the area of the porch enclosure.

Re-Birth as a Single-Family House (2001 to Present)

After Catherine Cantlin sold and vacated the house towards her later years, a young couple took ownership and set to work re-establishing functionality of the house as a single-family home.


The function of living room was relocated to the larger back room of the house, into what was previously Ms. Cantlin's bedroom. The second rear door off of the apartment kitchen was filled in. When exactly this kitchen was converted into a bedroom is unclear at this time, but the daughter-in-law reports that the house was still presented as a duplex when she helped sell the house in 2001, so it likely was not abandoned until that time. Both bathrooms were updated, and I believe it was during this ownership that the window at the original bathroom was filled in. An exterior deck was built at the back of the house, covering over both sets of concrete steps.


What exists now is a 3-bedroom, 2-bathroom single-family home of approximately 1,100 square feet. For now, this layout works pretty well for us. We'd like it to be perhaps a bit larger, and I have some designs in my head, but we'll get to those in due time. This house is over 90 years old and has seen significantly more change than I realized when I set out on my research. Yet, the journey and the in-progress results are fascinating, as the house has shifted and morphed along with all of its occupants.
Read More »

12 November 2015

A Proper Tour of the House

As I approach three months and 30 posts (this is #27) since starting this blog in August, I do want to take a quick moment to thank everyone who has read any or all of my posts thus far. It has really been enjoyable to get my research down on virtual paper, as well as to get alot of positive feedback. I also want to welcome some new readers from the great online community of old house enthusiasts at The Historic District-- if you love old houses, and especially if you are in the process of renovating one, you should really check the forums out there as you will learn quite a bit.

This far in, I've made several types of posts: those about historic documents, those about physically lurking around the house looking for clues, those about the neighborhood, and those about other houses.

One thing I haven't done? I haven't given you a proper tour of the subject house! Well, wait no longer.

First off, some views of the house from the front yard near the street and as you pull into the driveway. The house is 1-1/2 stories, with a main living floor and unfinished attic and basement. It is a 1920's bungalow style, with a front gable along with a hipped roof front porch. The house at present is almost fully clad in asbestos shingle siding:


A projecting bay at the kitchen breaks up the long and low facade on the left side of the house. The windows are not original but are modern vinyl replacement windows, double-hung. Vinyl false shutters adorn four of the windows at the front of the house, and although shutters likely never existed I have always liked what they add to the color scheme and curb appeal of the house. The roof of the front porch is supported by three solid stone piers of Wissahickon schist, and the ceiling is finished with painted bead board:


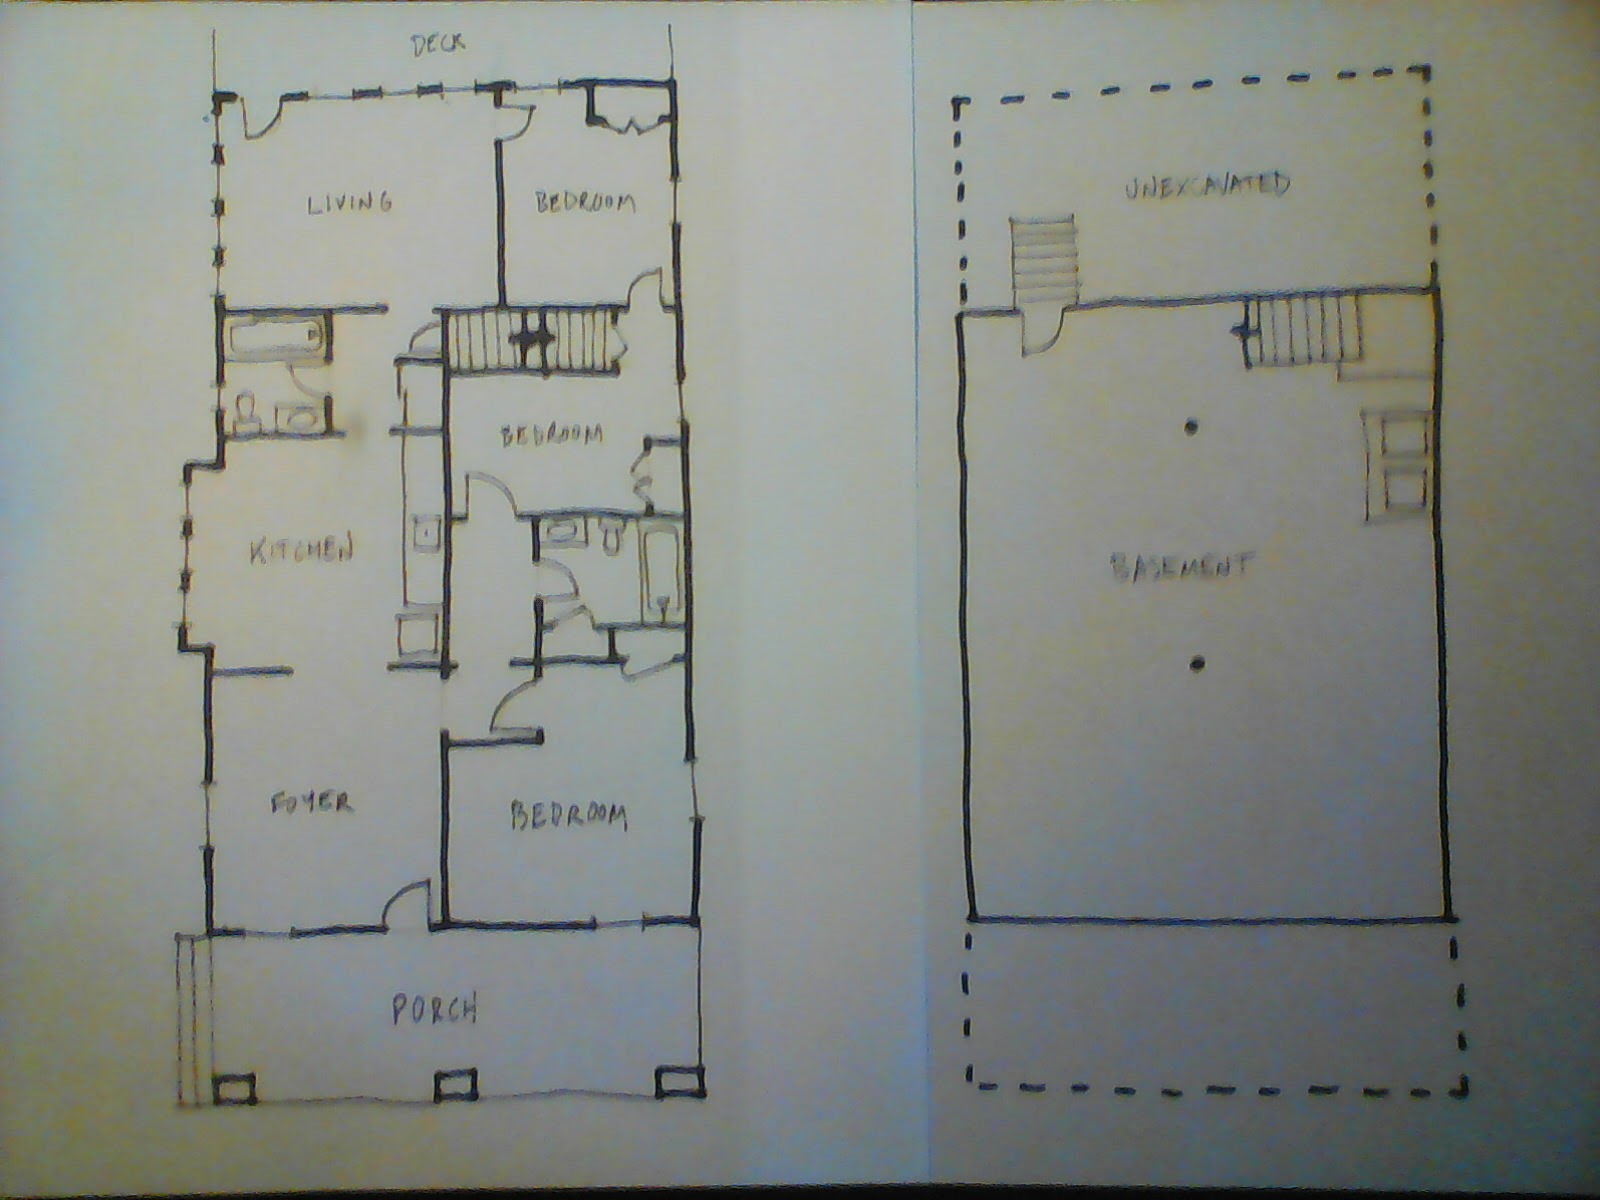
As we walk in through the front door, I'll present here a hand sketch of the main living floor and basement, which I've shared once or twice before:


Entering the foyer, which was likely the original living room of the house, one looks ahead through a trimmed cased opening into the kitchen, greeted by modern chestnut hardwood floors. The more private half of the home, with all of the bedrooms, is off to the right side upon entrance.


Into the kitchen, where modern cabinetry I believe may be Ikea but is of a simple style with ceramic hardware in keeping with the quaintness of the pre-Depression bungalow itself. A bay of three adjacent windows anchors the kitchen at the eat-in dining area:


Proceeding further towards the back of the home, we pass through a short hallway with a full bathroom on the left, and a closet and the access to the unfinished basement on the right.


After a quick peek at the basement, we head back up to the main level and enter the rear addition, built in the 1940's, which now houses the primary living room of the house. Most of the living room is lined with windows across the entire length, a result of a former exterior porch being enclosed in 1946.


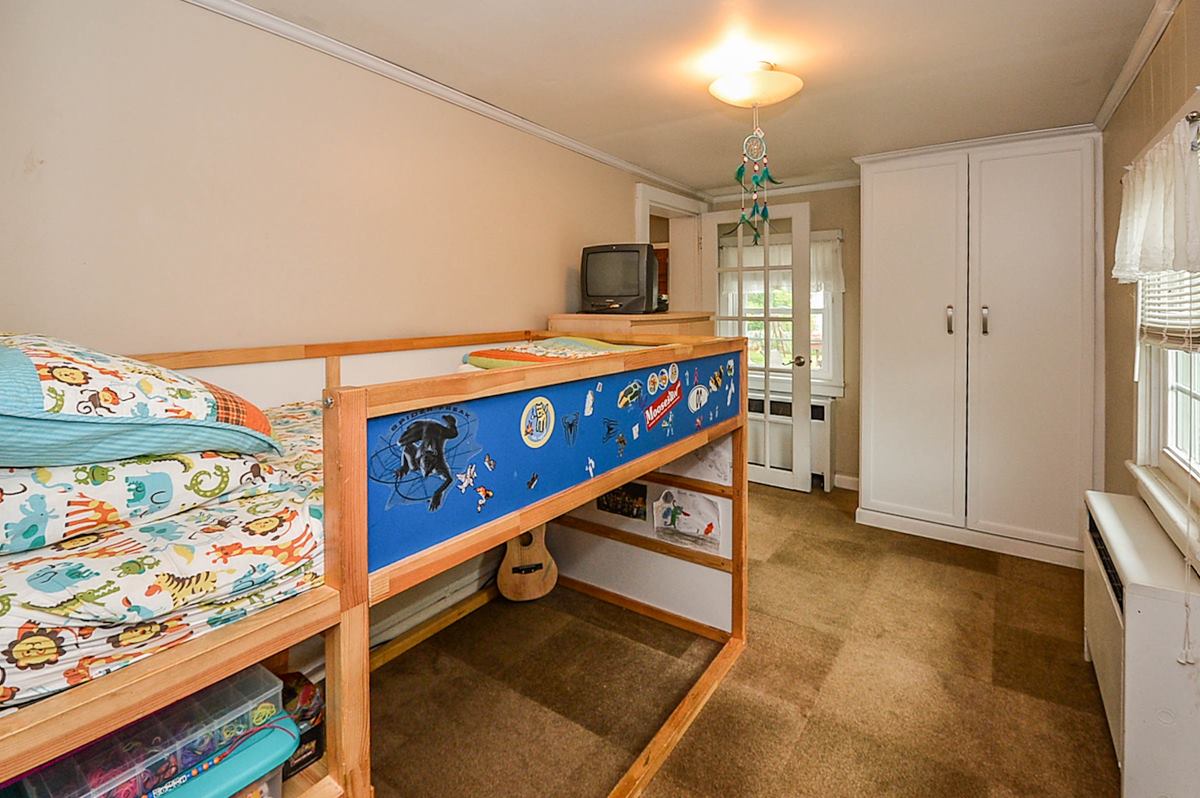
Heading through a single french door at the back right of the living room, we can actually begin a progression through a series of bedrooms towards the front of the house.


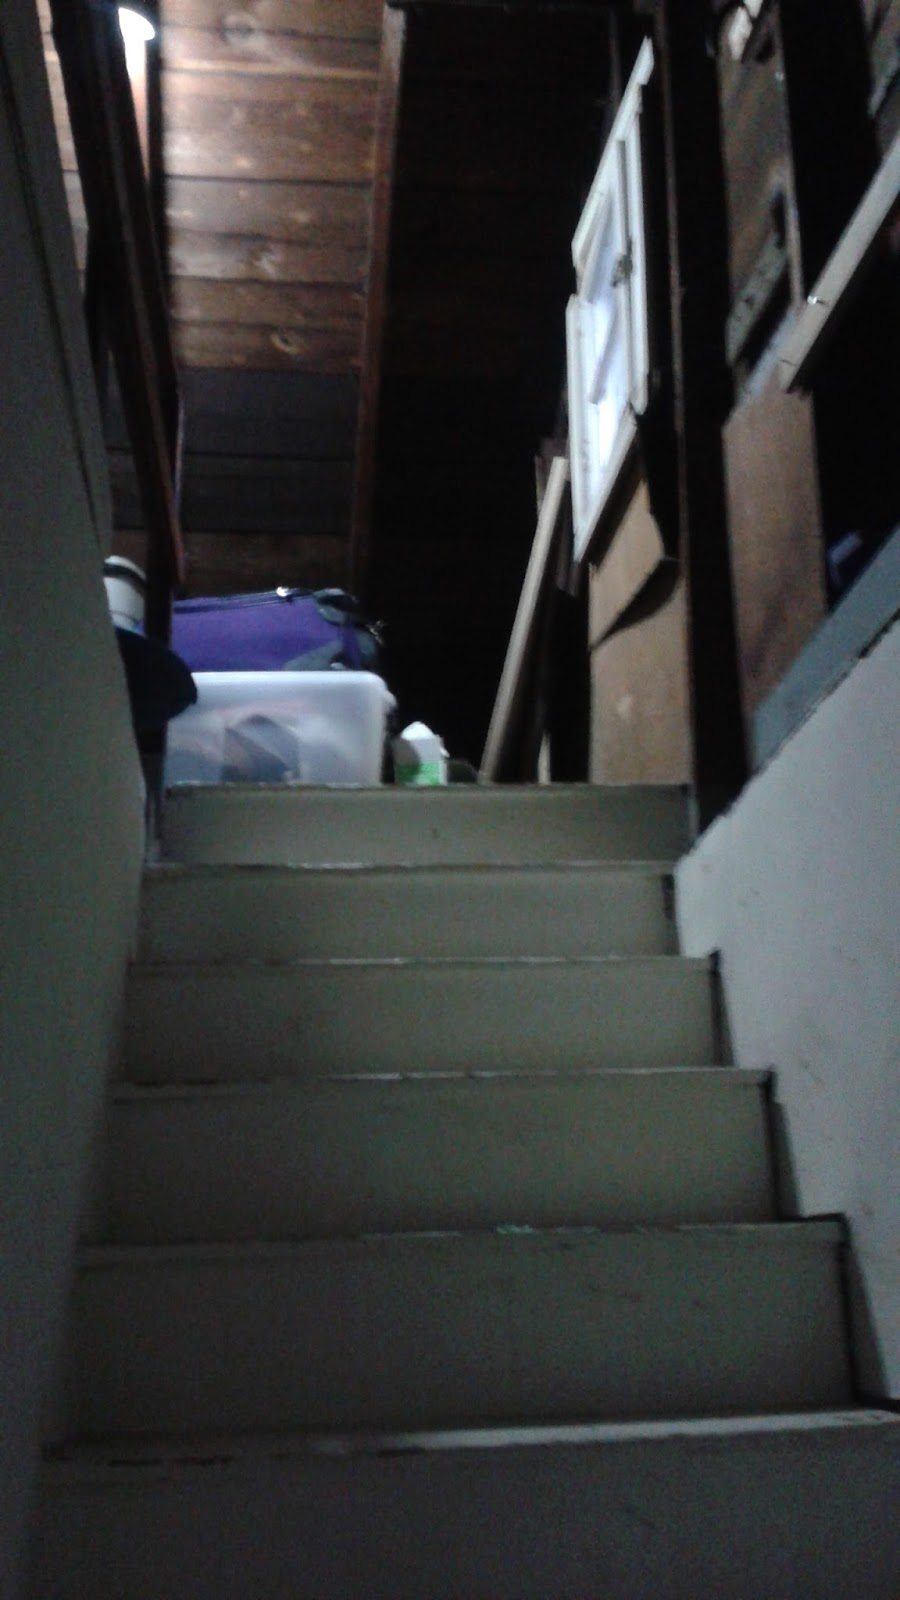
Once you pass through this rear bedroom back into the original house, there is a door leading to the walk-up attic (where I store a bunch of junk out of sight out of mind!):


Then through the second bedroom, into a hallway with another full bathroom, then the final bedroom before making your way back into the front foyer.


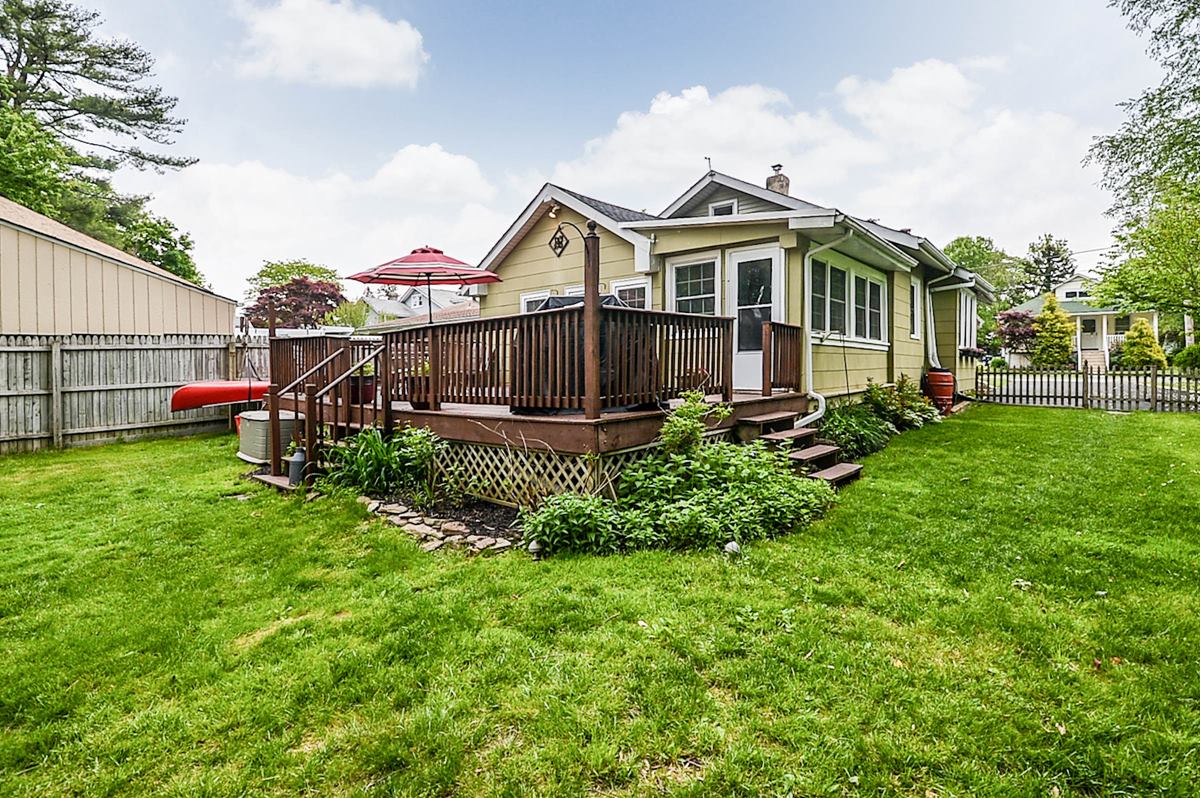
And lastly, a few photos of the backyard, rear deck, and the back of the home:


So there you have it-- it's quaint, it's cozy, it's home. I hope you've enjoyed the 90+ year history of this home presented thus far-- I have only just begun. If you are checking out the blog for the first time, take a spin through the archives, as well as the feature Saturday Spotlight posts where I examine the history of other local homes.

Believe me, there is much, much more I have already discovered but have yet to share here. There are more research methods and record types I will show you. There is more I have not even discovered yet myself. So stay tuned, and join me for the ride!
Read More »

29 September 2015

This Single-Family Was Once a Duplex

Last week, I described the evidence that I found in my house of an "old kitchen", no longer in use, and how I pondered whether the house's kitchen had been relocated once, if not twice.

Having thought through the unlikely scenario that the house's original kitchen was abandoned for a kitchen located at what is now the rear third bedroom (and then relocated back), the matter did not receive much further analysis until a visit to the Township's building department. While I will describe this visit in more detail in a future post, I obtained one document for my house titled "Record of Sanitary Drainage and Plumbing Fixtures."


Two-Apartment Dwelling

Looking at the document above, you see the owner's name listed as John Cantlin at our house, and a very clear description of the Building Type as "Dwelling 2-Apt"-- this house used to be split into two apartments. In the chart of plumbing fixtures at the bottom of the file card, there are listed: (2) bath tubs, (2) sinks, (2) wash basins, and (2) water closets. It is the (2) sinks, apparently meaning kitchen sinks, which stand out, as there is only one today.

The epiphany which I mentioned at the end of the Old Kitchen post was actually a specific sudden recollection. As we were preparing to move into this house, one of the many checklist items was officially changing my address with the USPS. In filling out the online form, the system prompted me to select either Apt 1 or Apt 2 as my new address (or to select neither). I, of course, at the time had been confused as to why there were apartment number addresses on file at the house. Now of course, with the township's plumbing record and the physical evidence of an abandoned kitchen, it makes perfect sense.

The fact that the house was at one point used as two apartments was further confirmed by my other immediate neighbor, who has lived next door since 1989. He relayed to me that indeed, when the elderly Mrs. Cantlin was living at the house, a man rented an apartment, accessed from the back door of the house.

Where was the Demising Line Between Apartments?

Let's again examine the floor plan sketch first shown last week. Where did one apartment end and the other begin? Each unit must have had a kitchen and a bathroom. While it would seem to make sense that Mrs. Cantlin would have wanted to maintain direct access to both the attic and the basement from her unit if she could have, that is not a certainty. There likely was not a fire-rated wall between the two units, although one would be required by today's code. There also are a number of present-day door jamb openings that could have acted as a "permanently" locked door between units.

There would seem to me to be three logical possibilities for a layout of the house as a two-unit building-- two options which incorporate two 1-Bedroom units, and one possibility that Mrs. Cantlin occupied a 2-Bedroom unit, giving her tenant a studio apartment in the rear.

Option 1: Two 1-Bedroom Apartments


In this option, the separation door is at the entrance into what is now the primary living room at the back of the house, with an additional separation door at the front hallway just past the first bedroom. This layout would have preserved access to the basement for the owner Mrs. Cantlin in the front unit, which may have been a plus. It also isolates the main unit's bedroom from the bathroom, which was likely a negative. A plus for the rental unit is that the bathroom is accessed off of the bedroom, which may have made it easier to rent.

Option 2: Two 1-Bedroom Apartments


Here, the demising wall is drawn at the end of the kitchen, with the other separation door heading into the center bedroom, right after the hallway on the right half of the plan. Pro: Mrs. Cantlin's bathroom would be accessed directly off of her bedroom. This layout also maintains a more clear front/rear relationship between the two units that appears more logical. Con: As the owner of the house, Mrs. Cantlin would have had to enter the tenant's unit in order to access the basement or attic.

Option 3: 2-Bedroom Main Unit, with Studio Apartment in Rear


With a studio apartment accessed at the back door, really only the Living Room and Kitchen within the addition would be absolutely necessary, with of course the bathroom included as well. This leaves two bedrooms for Mrs. Cantlin, as well as direct access to the attic.

Analysis and Next Steps

There is no definitive conclusion here without further clues. Physical inspection of the interior door jamb openings show evidence of door hinges having hung within all of them at one point or another, whether they were a separation between units or not. I believe Option 2 to be the most likely, since it preserves direct access from the main bedroom to a bathroom. Furthermore, the lack of direct access to the basement may have been a secondary concern. I suspect the studio apartment is less likely, as a second bedroom for the main unit may not have been absolutely necessary after the 3 Cantlin children moved out (likely in the 1950's) or after Mr. Cantlin's death in 1961.

Of course, there could be alternate layouts, but to date there is no physical evidence of significant floor plan alterations. The time period during which the house was utilized as two units is also not evident. While there appears to have been a rental unit through at least 1989, it is not clear whether the second unit was created before or after John Cantlin's death in 1961. The Township's plumbing document presented here appears to have been amended at several times over the years, with the earliest record on the card being the connection to the township sewer system in 1952. However, different handwriting and dates appear on the card. The number "2" next to (Kitchen) Sinks appears as a different style of handwriting, suggesting this number was changed from "1" at the time of the renovation. A date of 11/18/63 is given for an item "Test N. Bath"-- this could stand for "New" bath, which could suggest the time of alteration to coincide with a second unit. It could also stand for "North" bath which would be the bathroom on the right side of the plan-- a less confident indication of a renovation.

Further inquiries seeking out the permit numbers listed on the file card could yield more information. Also, probing the neighbors on either side could help narrow down the timeframe of the existence of a rental unit, as well as how often tenants changed.
Read More »

24 September 2015

Finding Physical Evidence: Old Kitchen?!?

Researching the history of your house must undoubtedly involve a thorough inspection of the inside and outside of your home with an eye trained towards unearthing clues. In previous posts, I have already touched on a few physical clues, such as those that tip off a previous rear addition, and the covering over of an exterior window in one of the bathrooms.

A few short months after moving into the house, before I got heavily involved in researching its history, I was in the basement trying to get a better understanding of all the piping hanging from the first floor joists above. Over by the stairs leading to the first floor was a pair of gate valves, on a set of side-by-side water supply pipes, with some duct tape wrapped around each. There was something scribbled onto the duct tape in black magic marker:

Copper water pipes, with old gate valves shutting off supply to the mysterious "Old Kitchen"
"Old Kitchen"?!? What does that mean? Houses do tend to undergo many physical alterations and changes over time, but relocating the whole kitchen would be one of the larger undertakings on the list. My immediate thought, and one that persisted for a bit, was that the kitchen of the house was at one time located in what is now the rear bedroom. I made this inferrence due to further inspection of the basement piping. Following the two water supply pipes with the duct tape tag, they turn at the foundation wall, heading along it for a few feet before penetrating through the foundation wall into the unexcavated crawl space. In addition, a sanitary drainage line pokes through this wall as well, right around the same location. These penetrations occur more or less underneath the demising wall between our living room and the rear third bedroom. Furthermore, this wall between the two rooms on the main level is extra-thick. These are all very strong indications that the wall is a former plumbing wall, with that bedroom being a former kitchen.

Copper pipes now oxidized where they run along the foundation wall. Sanitary drain pipe coming from the "Old Kitchen" is right below that.
However, that location as a kitchen doesn't make a lot of sense looking at the main floor plan. Sure, before modern homes valued the kitchen as a central feature of the house, kitchens were often located at the rear, more out of the way. But in this case, we have always been pretty certain that this location was part of an addition, constructed at some point after the original main house. Did the kitchen originally exist where it does now, in the center of the house, then get moved to the addition, then get moved again by my previous owners after 2001 (based only on the knowledge that they did a lot of work to the house)? That theory sounds a bit far-fetched and didn't make much more sense than the original theory.

Sketch of the main floor (L) and basement (R) plans. The presumed addition is the Living Room and Bedroom at top of the page, with unexcavated space at Basement level. Possible location of "Old Kitchen" is the rear bedroom-- the piping punches through the foundation wall at the location of the staircase in upper right corner of plan.
Still, someone in the past left this duct tape label over the abandoned plumbing valves, and I figured this most likely to be the previous owner of 2001-14. Surely the tape couldn't be more than 15 years old, right? I ran this by him, and he indicated that the kitchen was always where it was as far as he knew, but he had also had similar inklings of layout changes having occurred before his ownership. So it does seem that this duct tape was there prior to 2001 after all.

Then, however, at some point thereafter I had an epiphany...
Read More »

22 August 2015

What I Knew on Day 1

The scope for a house history can go in any of a number of directions.  There are various types of documents from which information can be drawn. We will visit those specific directions and documents in other posts. For me, for my house, I essentially want to know anything there is to know, and in this sense my research may never be considered "complete". Although I did not begin to heavily research the house until many months after I moved in, we always wanted a house with some architectural and historical character, and I was interested in the history the day we closed. So, what did I already know on Day 1?

Approximate Date of Construction
The real estate listing for the house declared the date of construction as 1920. Now, this cannot be definitively stated as a completely accurate fact.  Realtors pull construction date info from local public record databases, most often specifically in property tax assessment records. However, while these records can accurately tell you assessment history (especially more recent assessment history), the construction date listed is most likely not correct if your house is any more than a few decades old. Although the style of the house is supportive of a construction date in this time period, we cannot assume 1920 is the exact year.

Likelihood of a Rear Addition
Our home inspection was invaluable to us as first-time home buyers, and one item that was revealed during this inspection was that the rear living room and bedroom were likely part of an addition. One can tell this from a simple visual inspection-- as we made our way around the north side of the house, a crack/separation in the exterior siding indicates that the foundation at this portion of the house had settled a bit more than that of the main house and was likely built at a different time than the original house.
At some point, the house was re-sided to appear uniform throughout. The other area from visual inspection where an addition is obvious is in the basement-- the original foundation wall ends at this same location, right at the staircase to the basement (and attic, which also ends at this point). A peek into the existing doorway cut in the foundation wall reveals a crawlspace, the stairs which at one point provided direct access to the exterior, and the floor joists supporting my living room floor.

Style of the House
The style of the house is clearly that of a typical American bungalow. The term "Craftsman" could apply to this style, although generally connotes the presence of more elaborately crafted details than my house exhibits. Bungalows were often a single story (or single story with an attic) and were commonly built in the first few decades of the 20th century. Architectural features include a low-pitched gabled roof, often with deeper eaves. My front porch with tapered stone piers is also a typical craftsman bungalow feature, although they more typically extend to the ground, as opposed to sitting on the porch slab.

Diagram of a Craftsman Bungalow, courtesy of A Field Guide to American Houses, by Virginia & Lee McAlester

Previous Ownership
We certainly know who sold the house to us-- a couple not much older than ourselves, who have kids of their own as well, had owned the house for 14 years, and were moving to a larger house in town. Our deed also tells us that they bought the house from a woman of the last name Cantlin. This would be a bit of information for further exploration, and previous deeds will feature heavily in future posts. There had been no recent sales prior to 2001.

Renovations
It was clear that the previous owners had cared quite a bit for the house and put quite a chunk of change into it. The seller's disclosure form they filled out as part of the process of our transaction indicated such items as new roofs (likely c. 2001) for the back section (previously mentioned "addition") and for the front porch; the addition of a rear deck (2003); and infrastructural improvements such as a new domestic water heater (2001), and brand new natural gas boiler (2013). Although not detailed in documentation, other obvious improvements by these owners include hardwood floors throughout the living areas (modern, not original), and new tile finishes and fixtures in both bathrooms. Most likely the entire kitchen was modestly re-done including new (Ikea I believe) cabinets. Modern, dual-paned, double-hung vinyl windows (Pella) are also recent.


As you can see, even without doing much heavy searching, one can get a great start on a thorough history of the house merely by going through the process of buying it-- we've looked at the real estate listing, the home inspection, and the deed here as sources of information. Although some of these revelations are not "historical" in the sense they did not occur many decades ago, even the recent alterations are part of the long history of the home.

You will also soon come to see that, had I been looking even closer, additional clues would have been apparent...
Read More »